Whew. This has taken me longer to write than I thought, but here we are! I feel like I basically just repeat myself on the subject of basing every NaMo. It doesn't really change any!
The first step of painting a model horse in just about any medium is a good base coat. I paint in a layering combination of oils & pastel, but regardless of the materials, I think it's safe to say that most techniques start with an acrylic base coat. Base coats can be air brushed, or layered by hand with a brush. Last year I had fully intended to have an air brush in my life by this time, just to hopefully help speed up the base coat process, But here we are, a year later, & I still haven't gotten one. So I continue to lay down base coats by hand. Which I will say is a valuable skill as if you can put down a smooth base by hand, that means you can put down any amount of white markings just as smooth! (I still want an airbrush though, lol!) But I'm rambling! On with the important stuff!
The first step of painting a model horse in just about any medium is a good base coat. I paint in a layering combination of oils & pastel, but regardless of the materials, I think it's safe to say that most techniques start with an acrylic base coat. Base coats can be air brushed, or layered by hand with a brush. Last year I had fully intended to have an air brush in my life by this time, just to hopefully help speed up the base coat process, But here we are, a year later, & I still haven't gotten one. So I continue to lay down base coats by hand. Which I will say is a valuable skill as if you can put down a smooth base by hand, that means you can put down any amount of white markings just as smooth! (I still want an airbrush though, lol!) But I'm rambling! On with the important stuff!
| The way I approach basing is to try to pin point what the, well... base color, of the final coat color I am aiming for is. 2016's NaMo horse was this color base... | 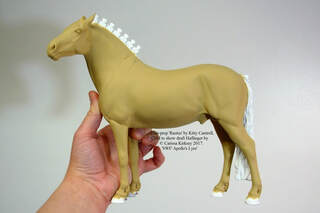 |
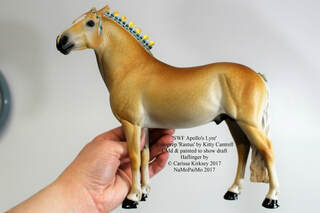 | For this color result. |
| & last year was this... | 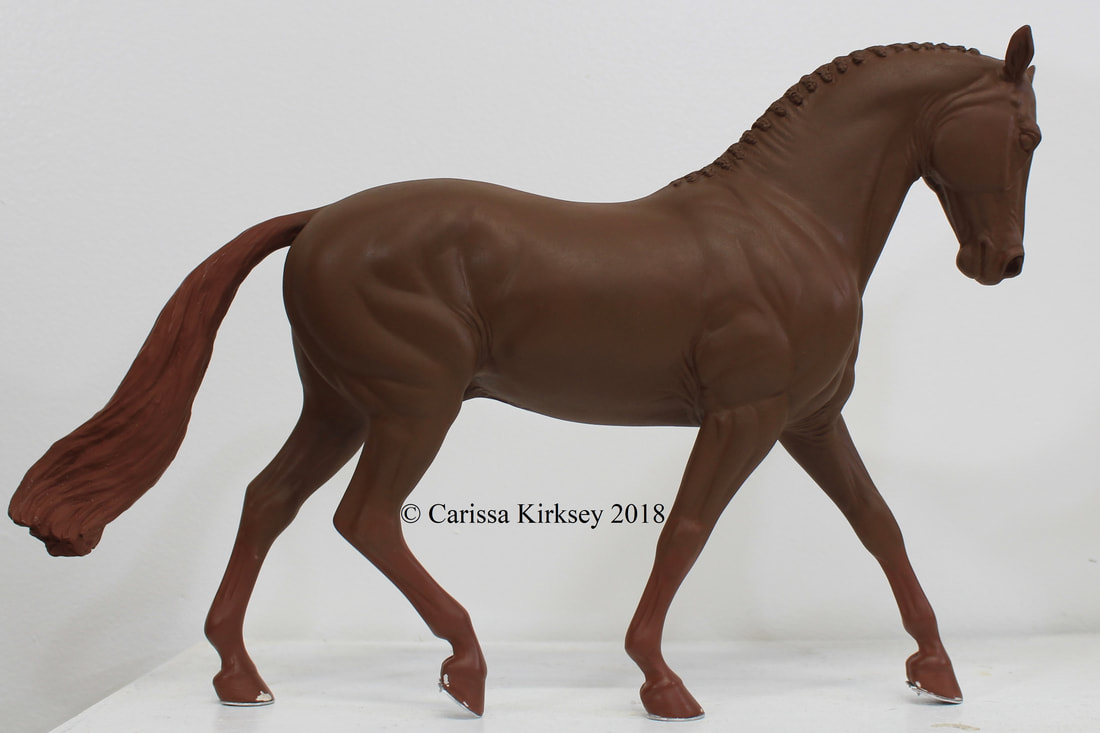 |
 | For this. (I seriously need to get a good picture of this guy!!) |
| This year I am aiming for this color by the end of the month. | 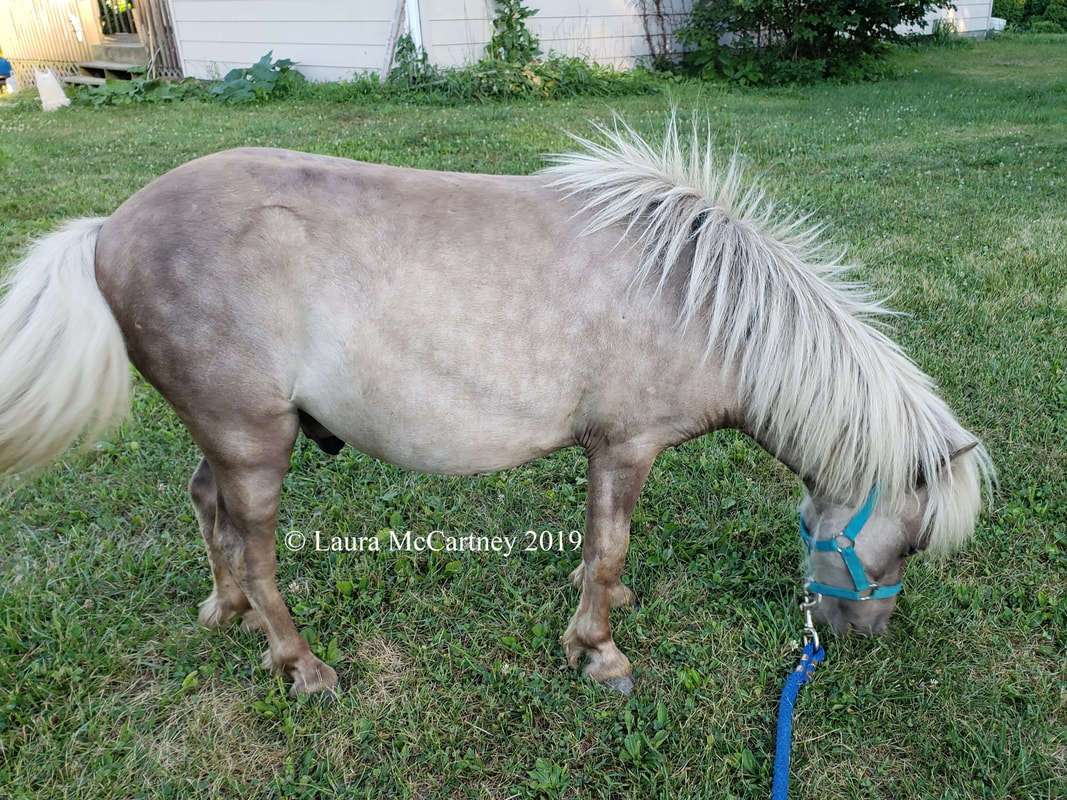 |
So that's my starting point. Never underestimate the importance of reference! ;) & the more of it the better! I have about 50 pictures of this horse, Astro, to go by, & it's all going to come in handy!
I don't really have a magic recipe for how to go about picking out the base color, practice is the best advise I can give, as unhelpful as that may be. I don't get it right all the time either, so mistakes happen! Read on!
The general shopping list for mixing a base color reads as follows:
* Acrylic in the color or colors desired
* Clear, black, or white Gesso (I use Liquitex Professional)
* Water
* A sealable container (the one I used is a condiment container from the dollar store, but they're not carrying them anymore)
* A stir of some sort (I use a popsicle stick).
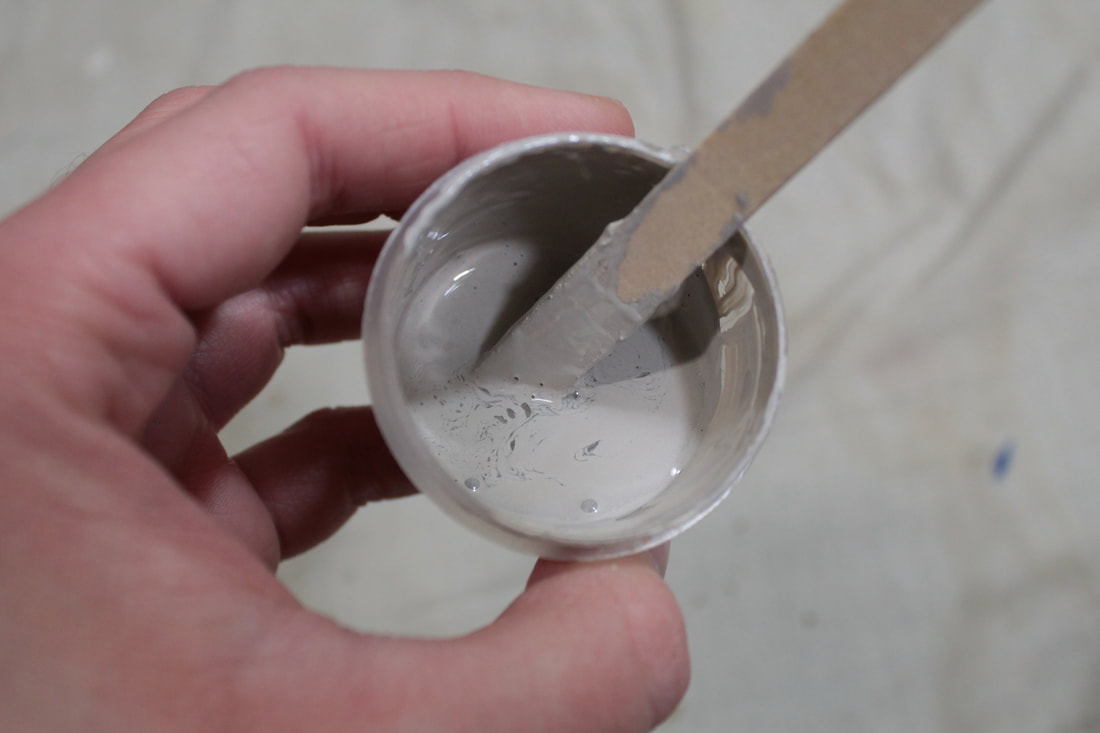
This silver color's base is kind of a bluish, brownish, grey, so in my ultra professional technique of "pour some in & see what happens", these wound up being the individual colors that I used.
I don't really have a magic recipe for how to go about picking out the base color, practice is the best advise I can give, as unhelpful as that may be. I don't get it right all the time either, so mistakes happen! Read on!
The general shopping list for mixing a base color reads as follows:
* Acrylic in the color or colors desired
* Clear, black, or white Gesso (I use Liquitex Professional)
* Water
* A sealable container (the one I used is a condiment container from the dollar store, but they're not carrying them anymore)
* A stir of some sort (I use a popsicle stick).
This silver color's base is kind of a bluish, brownish, grey, so in my ultra professional technique of "pour some in & see what happens", these wound up being the individual colors that I used.
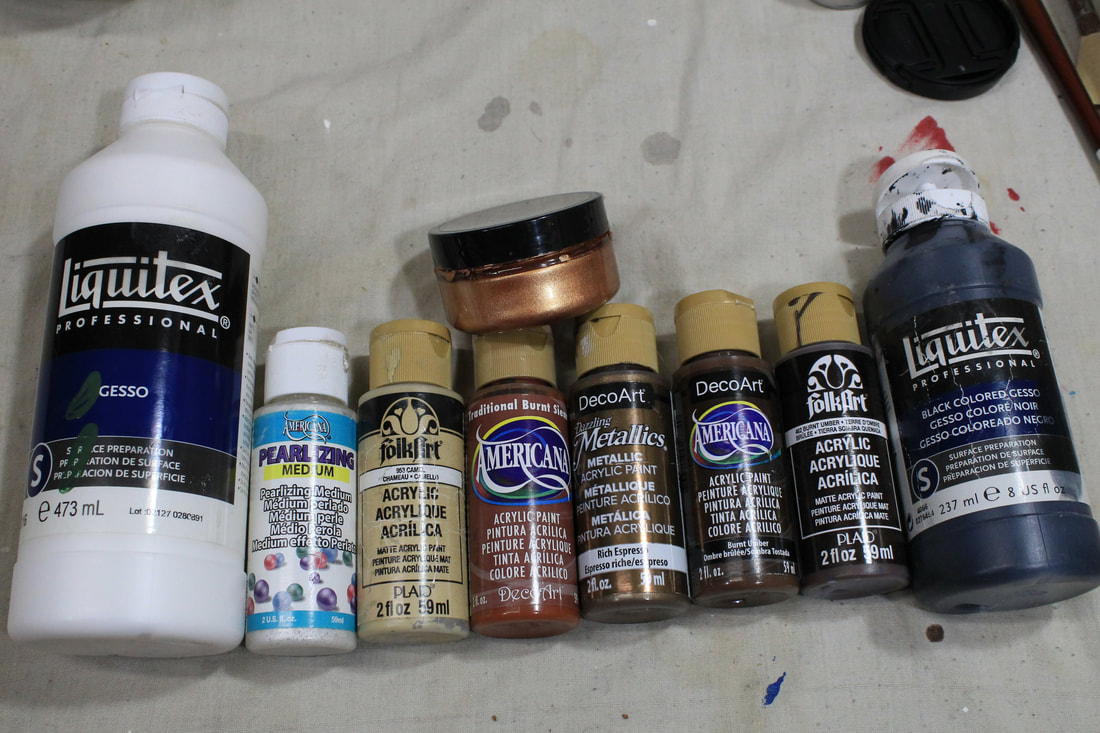
Left to right in no particular order: Liquitex Professional white gesso, Americana pearlizing medium, Folk Art camel, Americana traditional burnt seina, Deco Art metallic expresso, Americana burnt umber, Folk Art burnt umber (again, different brand), & Liquitex Professional black gesso. Above them all is Precious Metals metallic bronze.
As a bit of a side note: I've noticed that Folk Art acrylics are more opaque & more heavily pigmented than the Americana paints. This comes in handy for quickly building thin layers of your base coat. But, Folk Art is also really thick, so the bottles tend to dry out quicker than Americana.
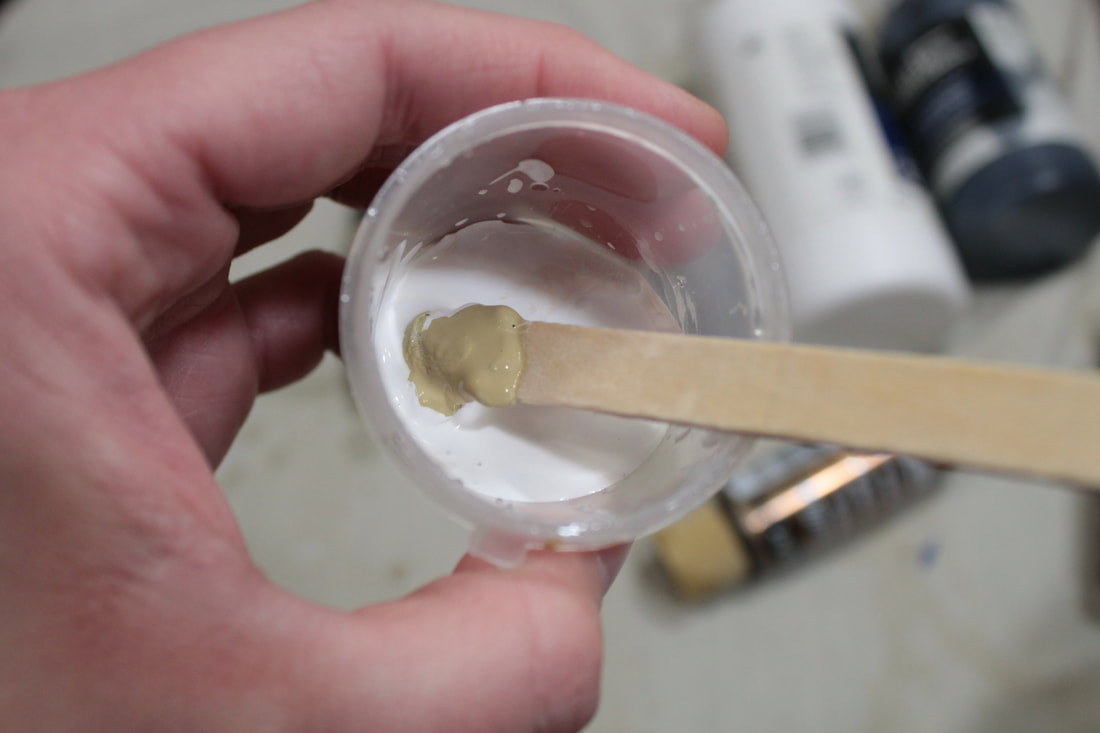
For silver dapple, White was of course the greater majority of the base mix, & for that I used what gesso. Always be sure that there is some gesso included in your base mix, either white, black, or clear; Gesso has 'tooth', a texture to give your next paint layer more to grab onto, & also the ability to sand if needed. Straight acrylic, on the other hand, will have more of a tendency to rip & tear if you attempt to sand it. So adding gesso is a great help if you find something that you missed in prepping that needs sanded down. Now, if you're not planning to use oil paints, but straight pastel or powder pigments, gesso may not be for you because of the texture. I'm not an expert on pastelling, but that would be my assumption. Do your research if pastelling is how you plan to go.
With the white gesso, I added a little bit of 'camel' color (seriously, they couldn't come up with a better name? *sigh*). Since white can be overwhelmed so easily by other colors, I wasn't even squirting paint out of the bottles for a lot of them, but dipping the popsicle stick in & adding dabs to my mix to build it up. I was sunk my first try on this base by adding too big a dab of black, so you really do need to be cautious with primarily white bases! I had to start over!
With the white gesso, I added a little bit of 'camel' color (seriously, they couldn't come up with a better name? *sigh*). Since white can be overwhelmed so easily by other colors, I wasn't even squirting paint out of the bottles for a lot of them, but dipping the popsicle stick in & adding dabs to my mix to build it up. I was sunk my first try on this base by adding too big a dab of black, so you really do need to be cautious with primarily white bases! I had to start over!
Once the 'camel' was mixed to my satisfaction, I added some Folk Art burnt umber.
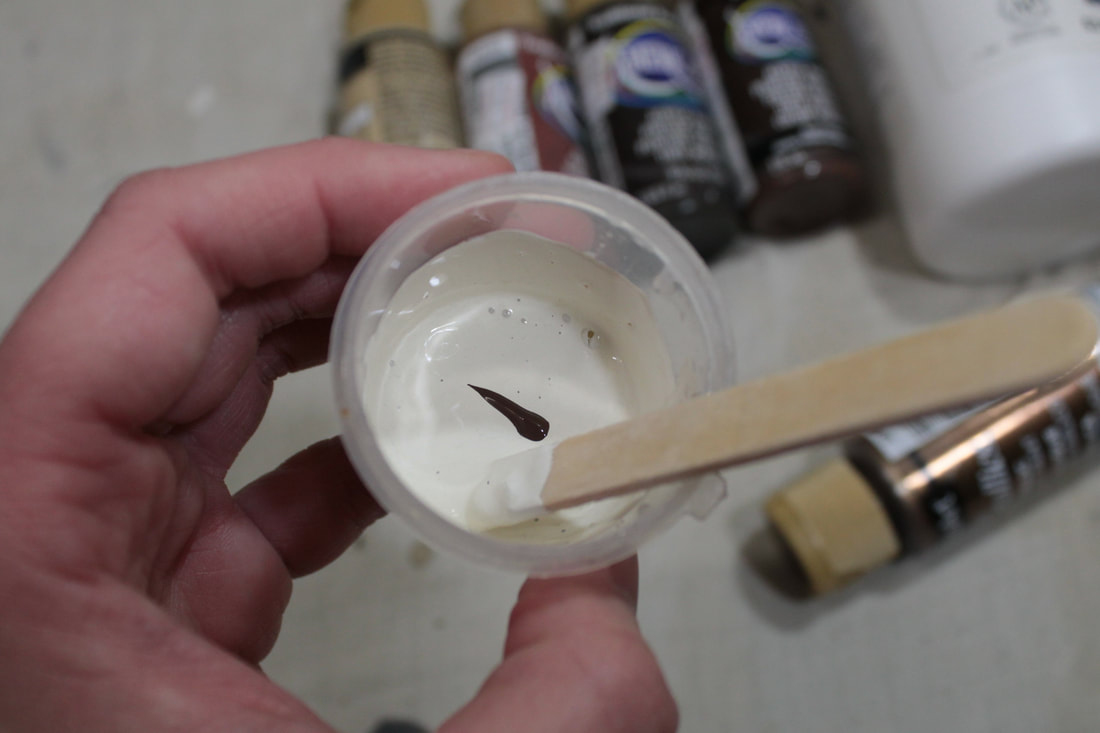
That gave me the greyish-brown color I wanted, but it needed a little more red to me. So I added some Americana burnt umber, which has a little more of a red hue. Shades can vary, sometimes dramatically, from company to company. Sometimes even batch to batch within a company.
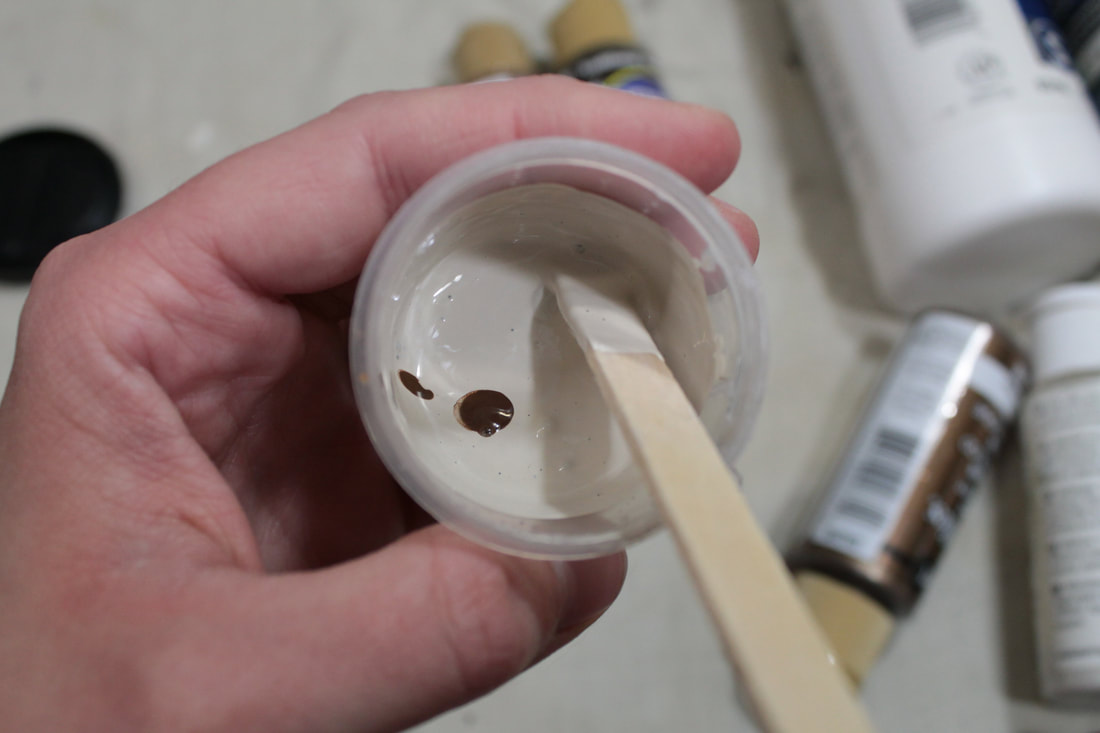
Just for the heck of it, I added some metallic 'expresso', pearling medium, & bronze to the mix too. I'm really not sure it will make any difference in the end, but we'll find out!

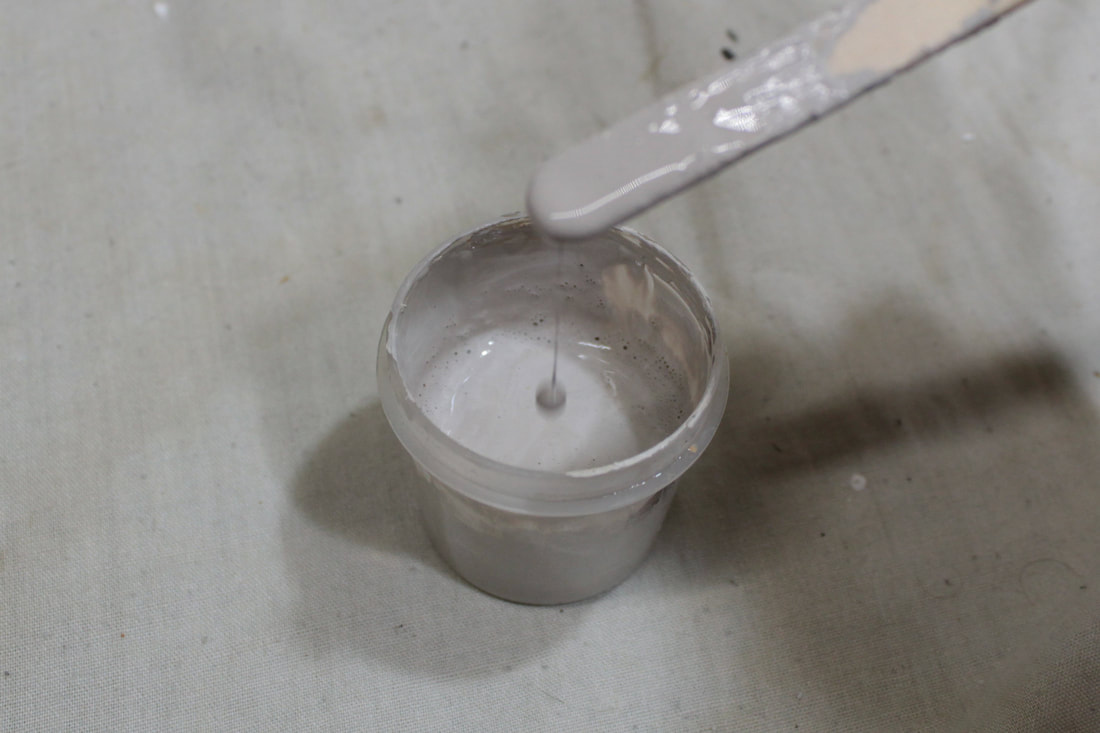
Added the tiniest dab of black, & this was my result.
After getting to the color I wanted, I added a little water to thin it down. Thinning the paint greatly helps to avoid building up brushstrokes in your base coat. Many thin layers are better than a few thick ones. I like to describe the consistency I aim for as being just so it coats the side of the container without beading up, but do feel free to thin it to what you feel is right.
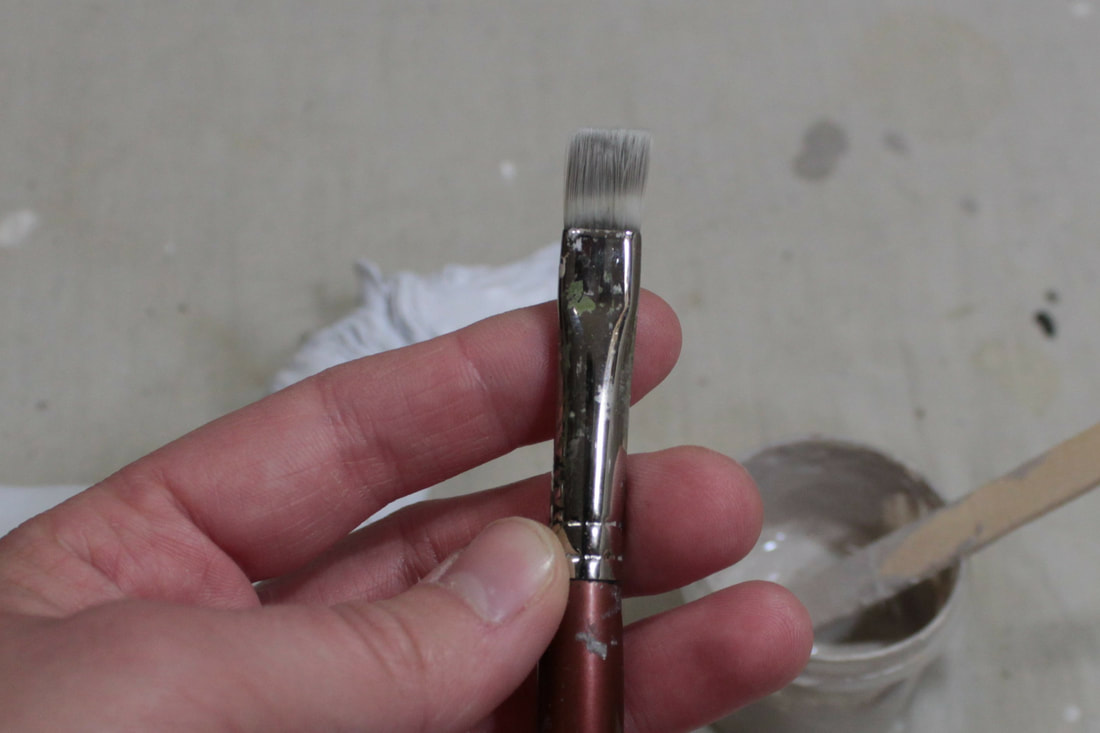
& with base mixed, I grab a soft half inch(?) synthetic or sable flat...
& start painting!
Dip only about the first fourth or third of your brush into the base color to avoid overloading your brush. You don't want to try to brush on more paint than you can spread before it starts drying. Adding only a bit at a time helps to keep your paint brush stroke free.
After completing the first layer on Kip, I decided that it was going to be too dark. So I added more white, & some more burnt umber I believe...
After completing the first layer on Kip, I decided that it was going to be too dark. So I added more white, & some more burnt umber I believe...
& moved forward with a little bit lighter color. ...Though it's really hard to tell in my pictures!!

As you paint, change the direction you brush to keep from building up brush strokes in your base coat. You want this to be as smooth as possible when you're finished. Here's a quick video of me adding a second layer. (My apologies for the door slam in the video! I'm not the only one in the house.) Lol, & after I say "don't add too much paint" I added too much paint on that first go!
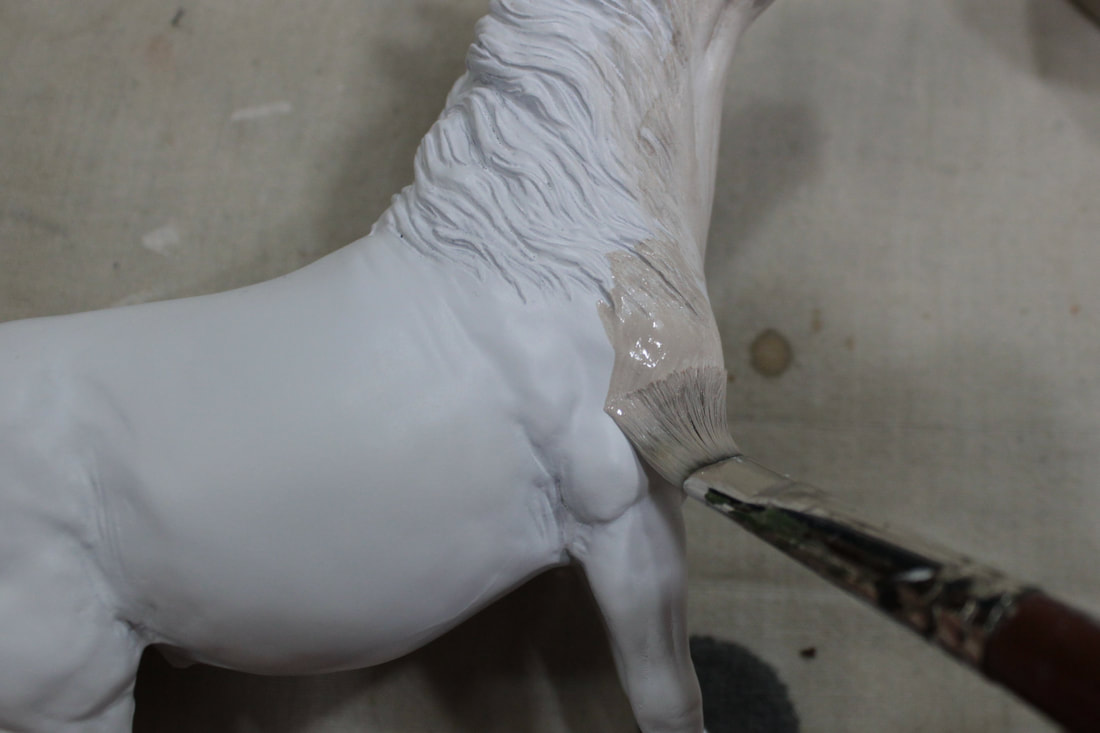
I like to start basing at the head, & work my way back until only my hand hold is left. On Kip, that hand hold is the end of his tail. I really prefer to not base where I will be holding the horse while I paint, as the base paint can wear off or even wrinkle up if handled too much. Worn off paint can be patched, but wrinkled paint will need sanded. All things I'd just rather avoid having to do.
Here is something to look out for as you lay your base: Tiny bubbles. I notice this happening if my brush is overloaded. Akin to squeezing out of a sponge, it leaves the paint with air in it. This isn't much of an issue over the (flat) body as you can brush it out. But in the mane & tail, it can cause trouble. You do not want to leave these bubbles to dry; they will leave little bitty holes in the base. Do your best to brush them out, even grab a clean dry brush if needed, or try to pop them by sharply blowing on them. If you do manage to miss some & they dry, it's not the end of the world. Simply carefully add more layers of base over them to try to fill them in, akin to the gesso to fill pin holes technique used in prepping (see previous post from 1/31/19.) ...I swear, part of painting is learning to troubleshoot as things arise!
Here is something to look out for as you lay your base: Tiny bubbles. I notice this happening if my brush is overloaded. Akin to squeezing out of a sponge, it leaves the paint with air in it. This isn't much of an issue over the (flat) body as you can brush it out. But in the mane & tail, it can cause trouble. You do not want to leave these bubbles to dry; they will leave little bitty holes in the base. Do your best to brush them out, even grab a clean dry brush if needed, or try to pop them by sharply blowing on them. If you do manage to miss some & they dry, it's not the end of the world. Simply carefully add more layers of base over them to try to fill them in, akin to the gesso to fill pin holes technique used in prepping (see previous post from 1/31/19.) ...I swear, part of painting is learning to troubleshoot as things arise!
After a few layers, I often like to spray a layer of finish over my base. This helps to keep from accidentally rubbing a hole in the base color while adding more layers, or while handling the model while painting. You may still rub off color, but you won't rub it off down to the primer, you will only go as far as where the finish was sprayed. The finish I used for this was *takes deep breath* Rust-Oleum Painter's Touch 2X Ultra Cover Matte Clear. It is a very thick & shiny matte finish which can be finicky to work with. It works well here since it is such a thick finish & won't rub easily. But be careful if you try it over a painted horse, it takes some practice to use it with success.
After the finish dries, continue adding several more thin layers until the finish is completely covered.

I lost count of how many coats I did on Kip's base, at least eight. & it did take me several hours to get full coverage. Be sure that there are NO thin spots. Though on this color, which is going to have many layers, it may not matter too much; But chances are that on any other color, you will see any thin areas show through on the finished paint job.
Though I mixed this specifically for Kipling, the color wound up being shockingly close to what I use for creamello, classic champagne, dunalino, & some palominos. As I do paint many horses, I mix paint in bulk batches so that I have base color on hand when I'm ready to start painting the next horse. As long as you put the container's lid on securely, it should last you for several months, especially if you remember to give it a stir & add a little more water every now & then.
& there we have a base coated Kipling. Next post will be on the first coat of oils, which will hopefully be up, soon?
As of right now, Kip's oils are fairly dry, but not dry enough to spray finish & move onto the next layer, so things are still quiet on him for now.
Happy painting all!
& there we have a base coated Kipling. Next post will be on the first coat of oils, which will hopefully be up, soon?
As of right now, Kip's oils are fairly dry, but not dry enough to spray finish & move onto the next layer, so things are still quiet on him for now.
Happy painting all!
 RSS Feed
