With NaMoPaiMo fast approaching the first day of February, work on prepping chosen models is in full swing! This year I will once again be sharing my blog with my friend Kim Prosek for reports on her project. I am pleased to welcome another of my friends this year as well, Carole Ingram, who will also be sharing her NaMoPaiMo progress with us!
Without further ado, let me hand the screen over to Kim for her pre-NaMoPaoMo post!
Without further ado, let me hand the screen over to Kim for her pre-NaMoPaoMo post!
My NaMoPaiMo entry for 2018! Maggie Bennett’s Furia, customized into a threatening Pegasus.
She is mostly prepped and primed here. I hope to paint her similar to a Ferruginous Hawk.
Let the madness begin!!
Let the madness begin!!
Isn't that Peggy awesome?? Kim did the CMing on her, of course, managing to find a bird figurine the right size for MM wings!
Kudos, my friend, for wrangling wings onto such a small pony!!
& now for a word from my friend Carole on her chosen victim!
& now for a word from my friend Carole on her chosen victim!
I just signed up (Jan. 7th), I'm going to do a PAM in chestnut.
Here is where I am now (Jan. 15th) on this snow globe snowy day here. I do have an issue; balance. I was hoping the apoxie/mane would throw her weight to that side. Nope. Tried to add to hoof. No good. I hate to have to peg front hoof.
Got the mare pegged (Jan. 18th) and worked more on her neck. I had a hoof edge and didn't want to mess up her frog so it turned out to be a trench. I glued it and next day used apoxie to even the hoof wall again. Just trimmed the peg to even all hooves, yay!! Have lots of time to prep so here is where she is now. I added to her ears and cheeks too.
Yay! Glad she is standing steady now Carole! She is such a sweet looking mare! She should look great by the end of Feb!!
As for my NaMoPaiMo horse, I have wanted to do a tutorial on how to paint the basic color bay ever since NaMoPaiMo last year. So when looking for a prospect for this year's NaMoPiaMo, that was on my mind. I found a Nocturno by Kitty Cantrell for a song, & I think he would just rock a deep & dappley bay!
He is second hand, his mold having been released in 2002! (Good Lord, was that really 16 years ago?!?) He had a basic prep job, a coat of white primer, & a layer of airbrushed acrylic. He had also suffered a cracked tail which had been repaired. His great price more than made up for any of this though.
My! I never realized how BIG this sculpt is!! He's quite a hunk!
Even though he was packed really well in a box that was a good size for him, that tail didn't agree & completely broke in shipping (much to the dismay of his seller!). I was fine with this though; I had planned to reinforce it anyway, to prevent just such a brake from happening in the future. So I was not in for any more work than I had already planed to do. It also gives me the excuse to share with you how to reinforce breaks!
Reinforcing Breaks With Wire Or Brass Rod
I have used this technique many times on weak & broken legs, tails, ears, & hair tendrils. It gives the weakened piece much better support than simply gluing it back together does.
You will need:
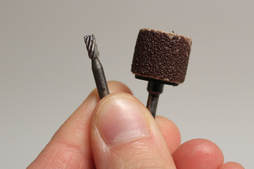
*A Dremel
*A high speed spiral flute cutter bit (I had to look that up! I have no idea what size it is, I've had it forever.) ...Or whatever size & shape bit will work for your project
*A 1/2" sanding drum ...or files & some elbow grease
*A Dremel
*A high speed spiral flute cutter bit (I had to look that up! I have no idea what size it is, I've had it forever.) ...Or whatever size & shape bit will work for your project
*A 1/2" sanding drum ...or files & some elbow grease
*A respirator & safety goggles
*Wire cutters & two pairs of pliers in a size hefty enough to cut & bend whatever gauge you are using
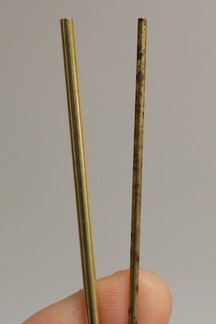
*Wire or brass rod in a gauge suitable for your brake (I used brass rod from the hardware store, in 2.38 mm & 1.57mm.)
*Locktite super glue gel control
*Baking soda
*Epoxy, I used Aves Fixit, which is a very dense & sturdy epoxy
*Sand paper, my preferred grit being 220
*Any sculpting tools needed to resculpt lost details
Regardless of where the break is, the approach is pretty much standard:
*Wire cutters & two pairs of pliers in a size hefty enough to cut & bend whatever gauge you are using
*Wire or brass rod in a gauge suitable for your brake (I used brass rod from the hardware store, in 2.38 mm & 1.57mm.)
*Locktite super glue gel control
*Baking soda
*Epoxy, I used Aves Fixit, which is a very dense & sturdy epoxy
*Sand paper, my preferred grit being 220
*Any sculpting tools needed to resculpt lost details
Regardless of where the break is, the approach is pretty much standard:
With your chosen bit, mine being the cutter bit, Dremel a groove deep enough to inlay your wire across the break. I often draw a line where I want to Dremel, just to keep myself on track. For this break, with it being such a pressure prone spot, I decided to add three lengths of rod. The more wire you inlay at more locations around the break, the stronger the result.
As you can see, this is dusty work, so be sure to wear dust & eye protection!
Cut your wire & test it for a snug fit. I am using the bigger 3/32 (2.38mm) rod here.
Cut your wire & test it for a snug fit. I am using the bigger 3/32 (2.38mm) rod here.
Then with pliers, bend it to fit the contour of where it will be inlayed. Being a nice straight tail, this wasn't too difficult. If you are doing a leg though, it can sometimes take quite a bit of tinkering to get it to flow with the bends & shape of the leg.
If your break has a gap, glue the two pieces together as best you can before you add the wire. Once that is done, lay down a line of super glue in the groove you made, sprinkle a very little bit of baking soda on top, & carefully lay in your rod. Pliers come in handy here to place the rod & to force it down snuggly into the groove. You may wish to wear gloves to keep from getting glue on your fingers.
Add a bit more glue around any gaps between the wire & the resin/plastic, wipe off the excess, & then pack it with baking soda. You can press it down firmly with a paper towel, but be aware that some of it may get glued to the horse (or you). Scrape off any wayward glue/baking soda before it sets well, I used a carbide scraper.
After doing all three rods, the tail was much sturdier but I felt it could use a little more support. Best I could, I Dremeled a groove under the tail as well. I inlayed a length of 1/16 (1.57mm) brass rod the same way as the other three. I used the finer rod just to simplify it considering the awkward place it was needed.
Sometimes the rod winds up being a bit above the level of the sculpture. That is where the sanding drum &/or files come in: grind down any wire that would show above your sculpture until it is level with the surface or even a smidge below it.
Once all the brass rod was laid & ready to go, I mixed some Aves Fixit epoxy & pushed it into any crevices remaining, then resculpted the lost details. I chose Fixit since it is a very dense, hard epoxy once cured. I often use A + B epoxy which is even harder, for the more breakable areas like this. But it is more difficult to work with. Since I needed to sculpt hair here, I opted for the easier-to-use Fixit.
Once all the brass rod was laid & ready to go, I mixed some Aves Fixit epoxy & pushed it into any crevices remaining, then resculpted the lost details. I chose Fixit since it is a very dense, hard epoxy once cured. I often use A + B epoxy which is even harder, for the more breakable areas like this. But it is more difficult to work with. Since I needed to sculpt hair here, I opted for the easier-to-use Fixit.
Here is the repair after sanding the entire horse good & hitting him with some primer. The repair still needs sanded & worked a little more before I am totally happy with it, but it is now sturdy enough for me to hold him by the tail!
I have used this technique for many scales, the finest being a LB scale foal, a Spark AR. She was a second, missing a wire in one of her fine little baby legs. I used, I'll guess 32 gauge, steel wire meant for the foundation of frames in a bee hive. Being steel, even as fine as it is, it is sturdy enough to use as reinforcement (works great for tail tendril armatures too!). I have also repaired the leg of a Lrg SM AR, Sherbert Lemmon, with a steel paperclip!
So as long as you can Dremel a groove & find strong enough wire, this technique can be used on many scales & for many weak pieces!
Stay tuned through the end of this month & all of February for many more reports on & tutorials for NaMoPaiMo!
Cheers all!
 RSS Feed
