Tomorrow's the day! The start of NaMoPaiMo 2019! I'm, almost ready. Prepping this week has been interesting. Not because of the model, but because of the weather. It's been single digits & below zero for the past few days, making it too cold to spray primer. He is technically prepped though, so all's well! I'd just prefer that he be ALL white! (You'll see, keep reading!)
Weather aside, I can still show you some of the process of prepping him.
Firstly to start off at the very basic action of prepping a model horse: It is the process of preparing your 'canvas' for painting. It is important to smooth out any blemishes, which can affect the smoothness of your finishwork & it's color, & faults also can knock a finished horse out of placing at a show. I'll be painting an artist resin (AR), which is a hand cast copy of an original sculpture.
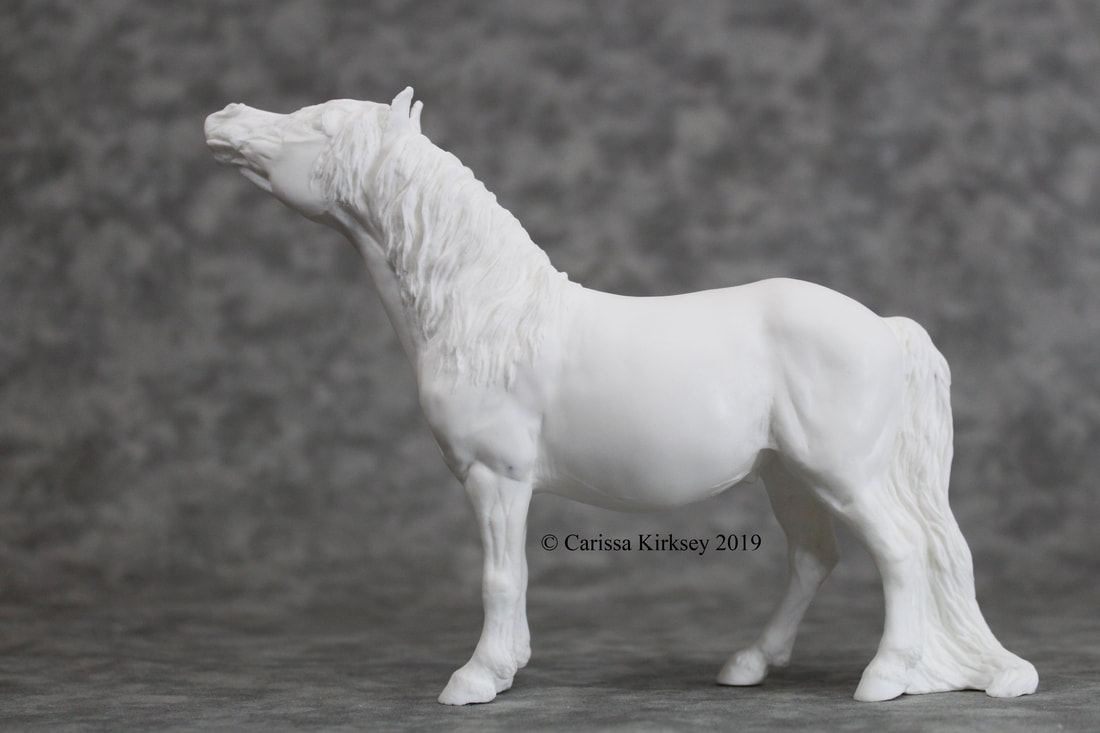
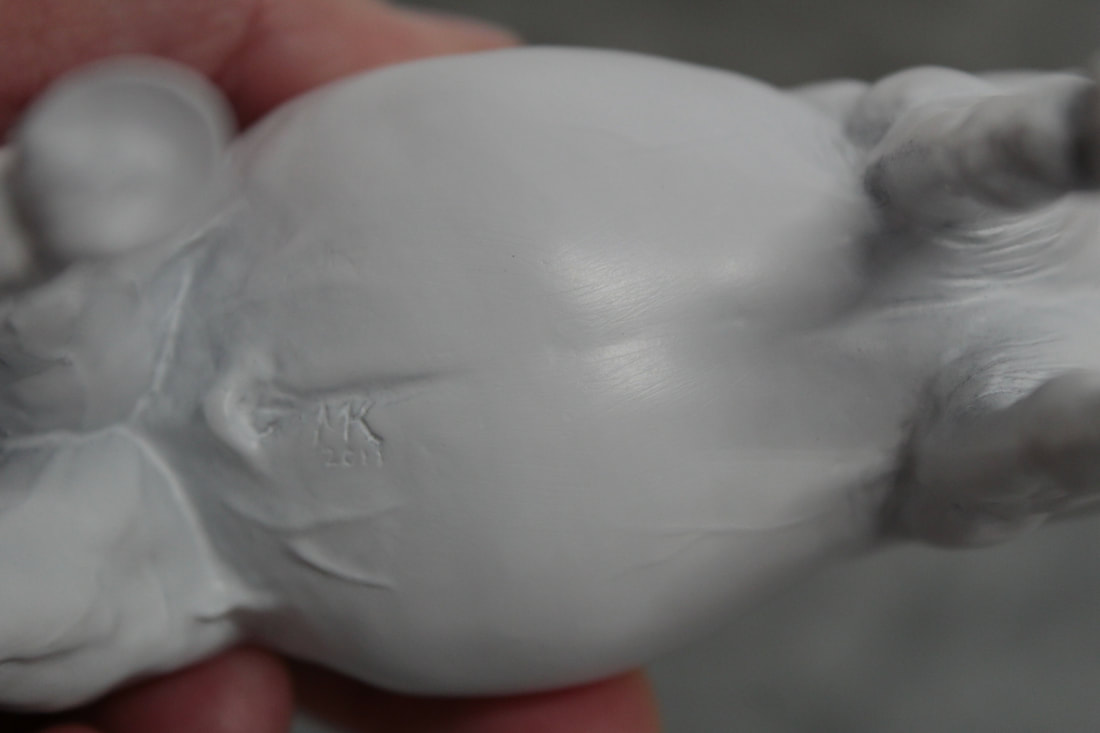
Unpainted Kipling resin
ARs come from the casting companies with only the very minimum of clean up done to them once they're pulled from the mold. So there are always at least some mold seams that need to be addressed. Here are a few of the things that I could see needed taken care of on Kipling.
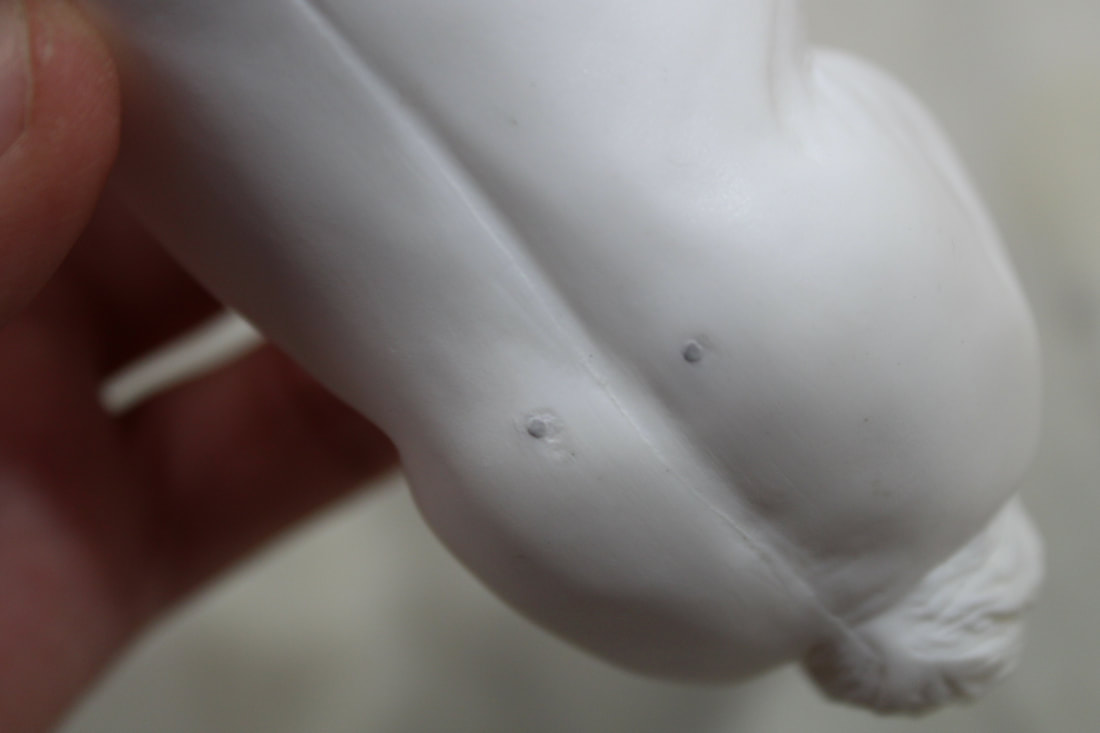
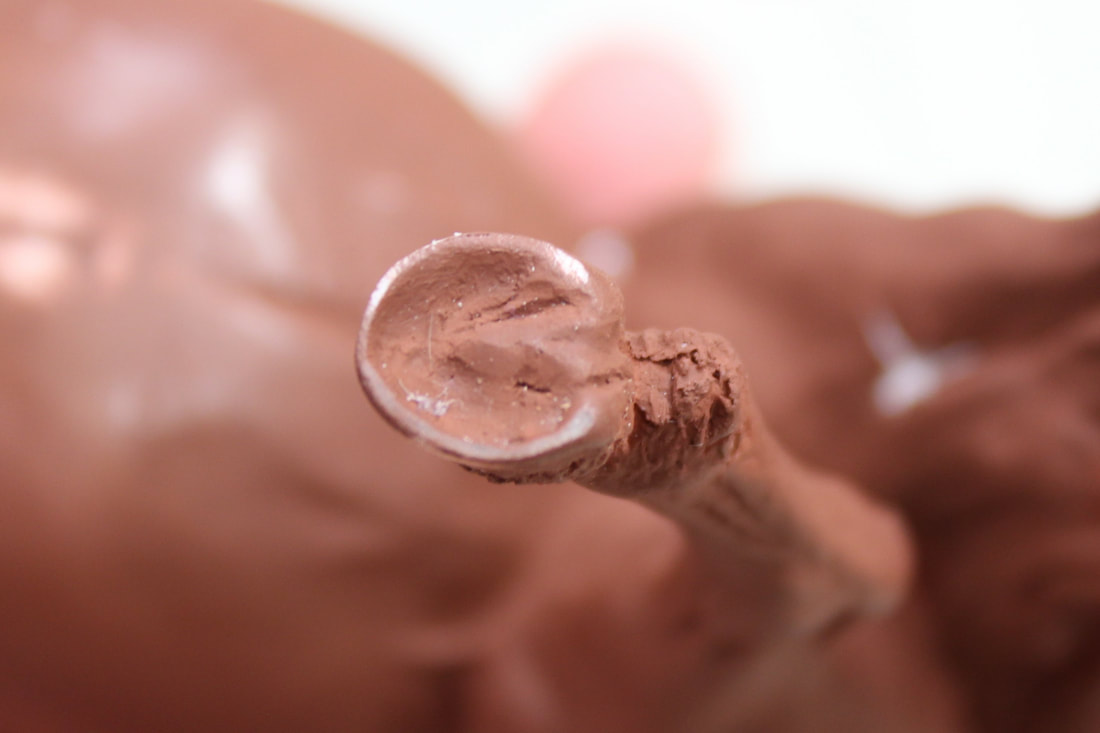
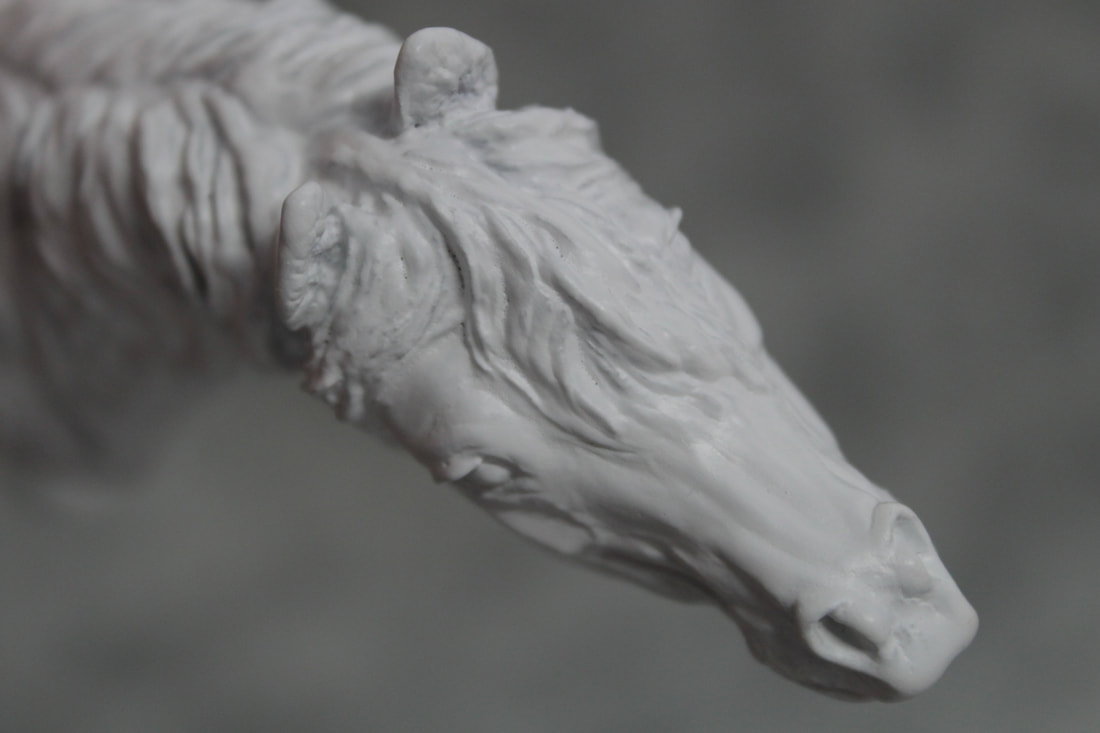
Here we have two small seams, one down the middle of his forelock, & one across the side fwip of forelock. (They're there, trust me!)
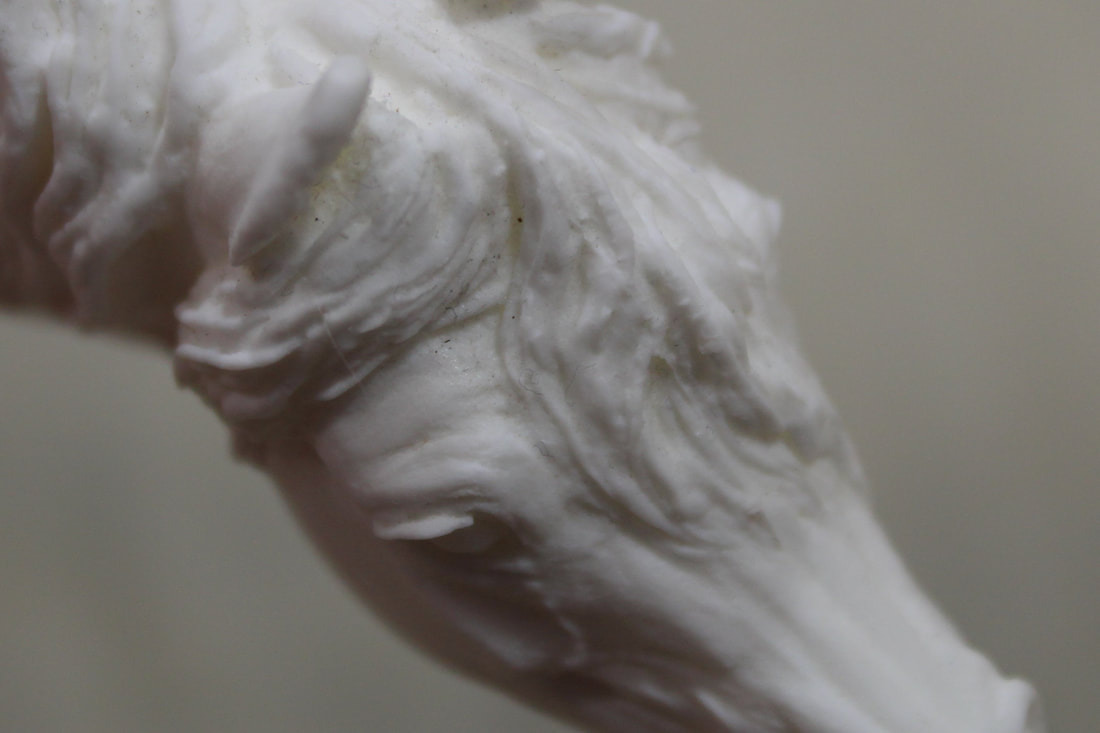
& here you can see some 'pin holes', bubbles in the resin that leave tiny holes behind. & less visible is the uneven & slightly rough surface from where the caster Dremeled off the pour from where the resin was poured into the mold.
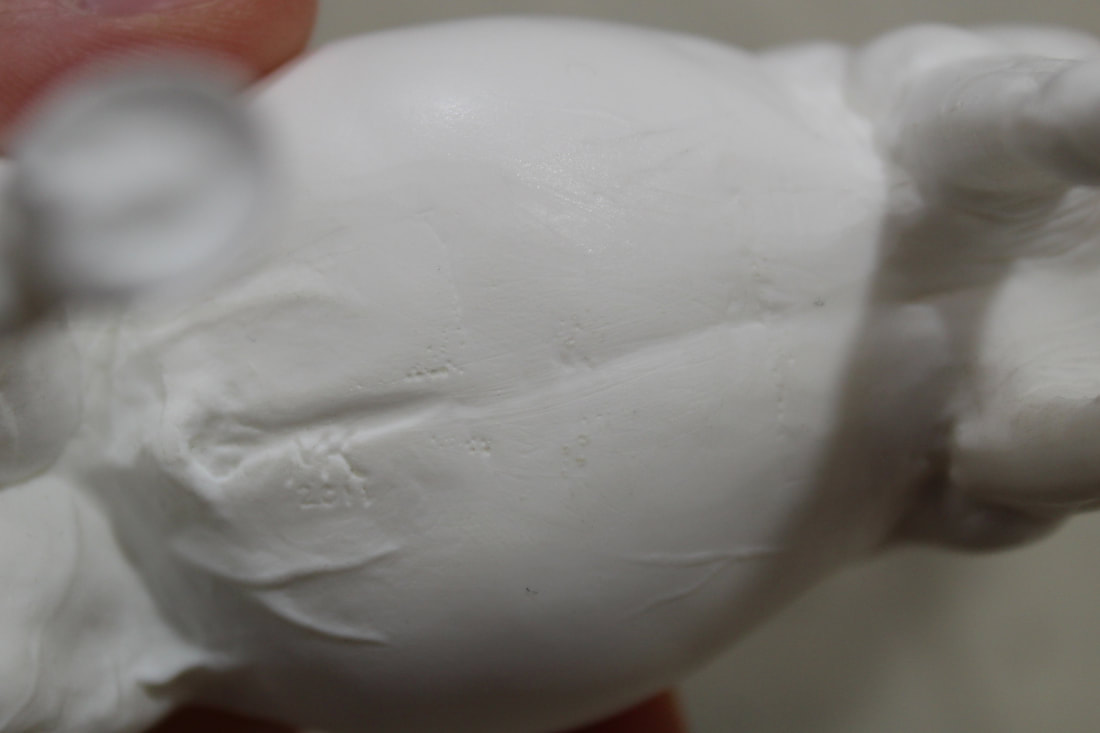
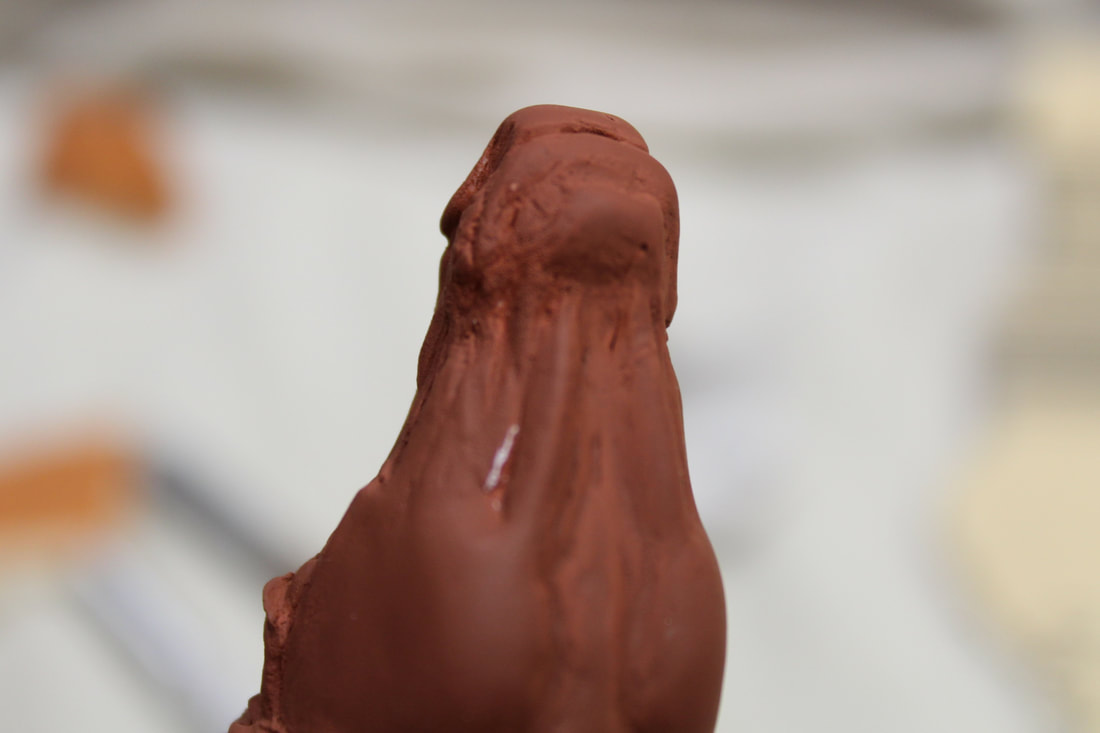
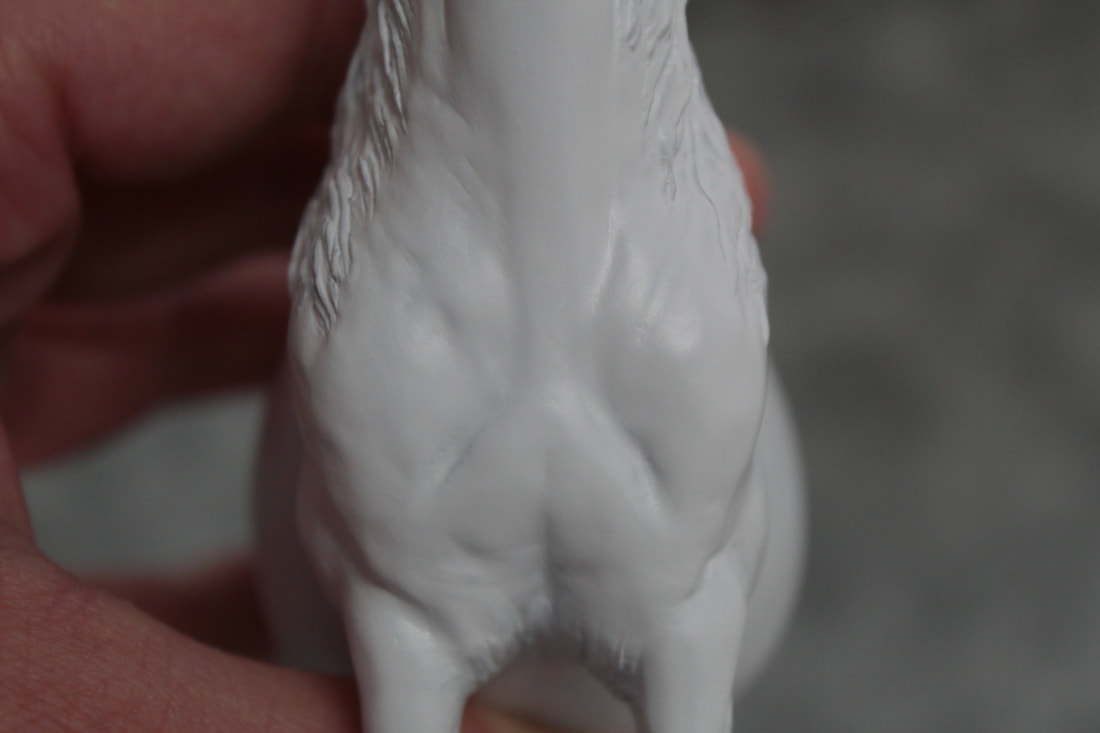
This is another area where they Dremeled a little too much off, probably while knocking off seams or flashing (where some resin leaks out between two parts of the mold). & a few more pin holes along his neck too.
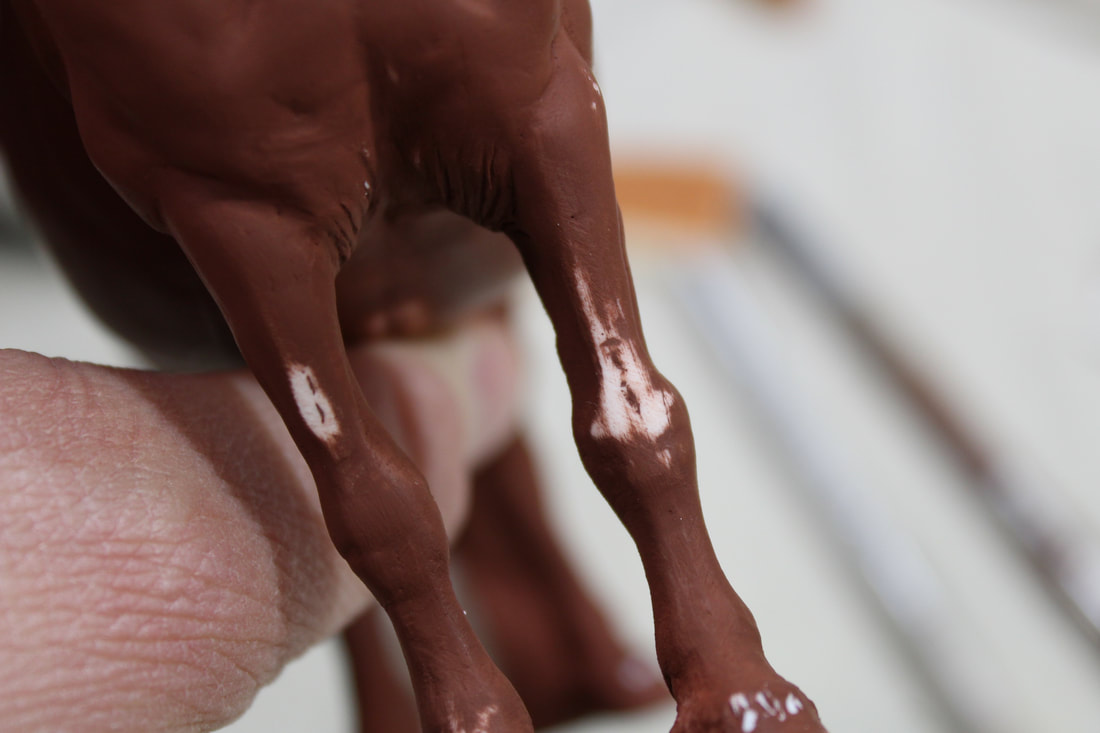
This was a new one to me: these are actually the reinforcement wires that run through his back legs! They are apparently so long, they showed through on his back! Not a problem, but they did leave blemishes on the surface that would need filled. Also, more seam.
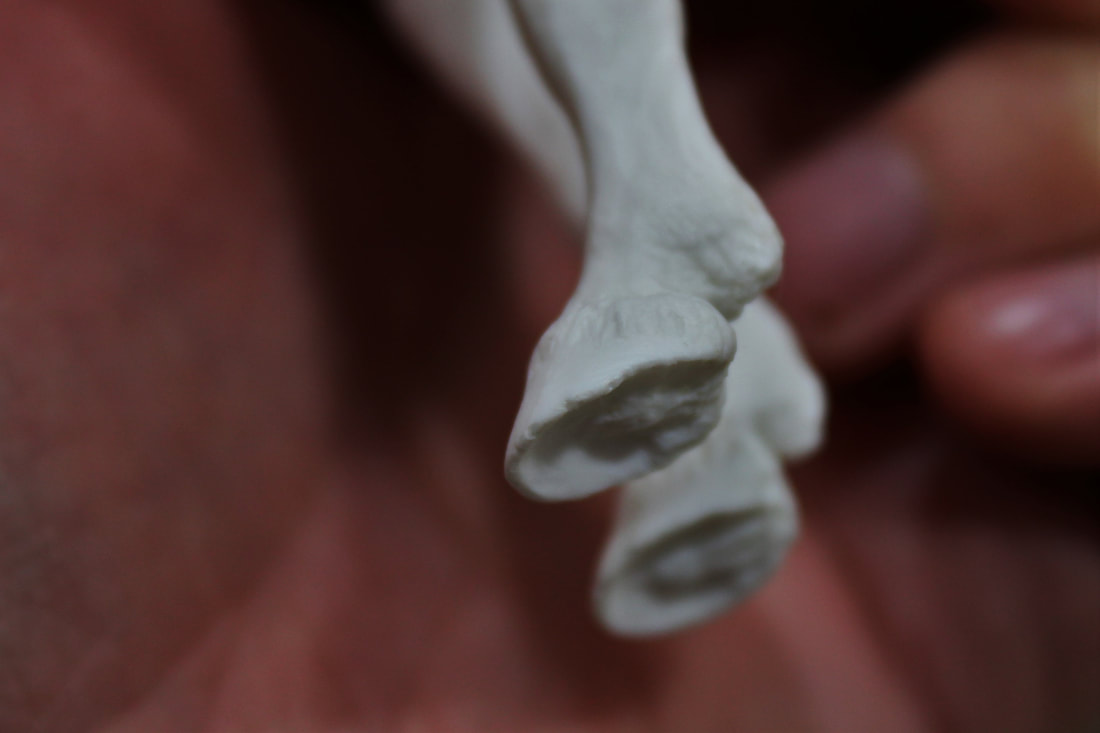
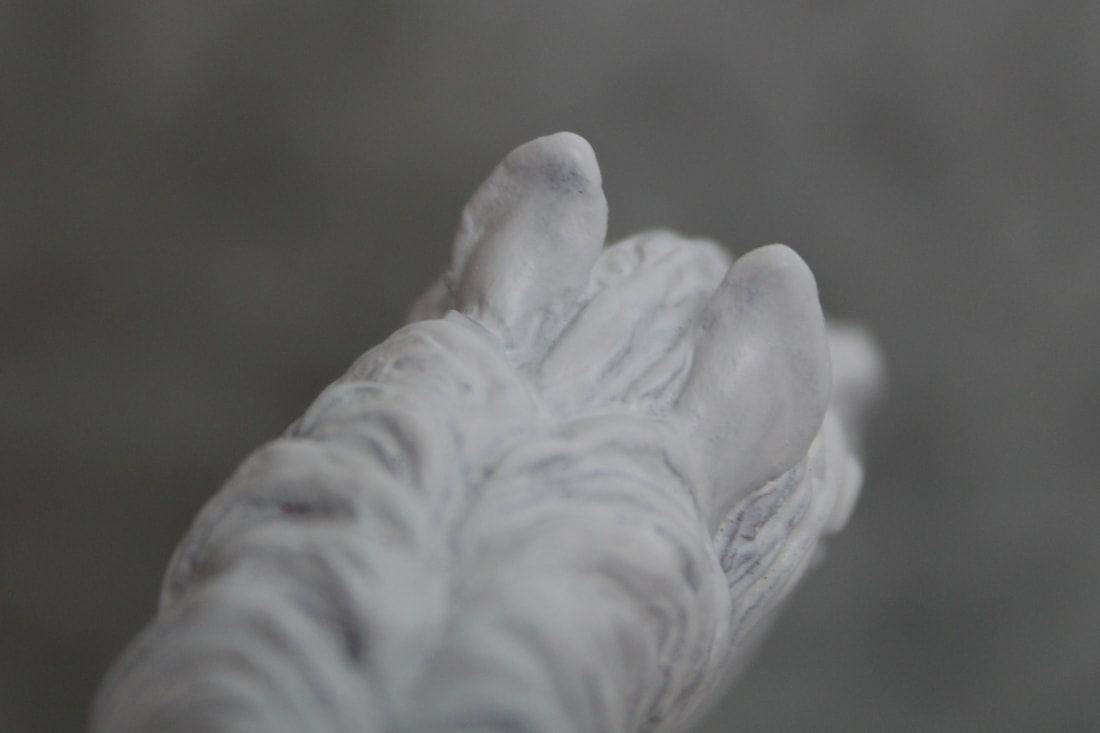
This was the biggest issue (which wasn't much of one): Pin holes all along one hoof 'ate' the edge off.
To tackle these prepping issues requires a few various tools & supplies. Here is everything that was used for prepping Kip:
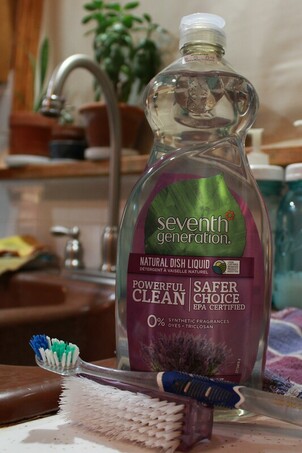
Dish soap, warm water, & soft brushes (nail & tooth). Resins should be washed thoroughly at least once to remove mold release (or mold pam as I like to call it!) that may resist paint. Get down into all those little crevasses & scrub! You may want to wash the AR again before spraying primer to wash away dust from prepping. Make sure they're dry before you spray though! Priming water doesn't work well, trust me.
Dish soap, warm water, & soft brushes (nail & tooth). Resins should be washed thoroughly at least once to remove mold release (or mold pam as I like to call it!) that may resist paint. Get down into all those little crevasses & scrub! You may want to wash the AR again before spraying primer to wash away dust from prepping. Make sure they're dry before you spray though! Priming water doesn't work well, trust me.
Sandpaper in 220 & 320 grit, carbide scraper with the tapering round & the chisel tips, small round & small triangle files. Two different white gessos & modeling paste (gesso is much like acrylic paint, but with 'tooth' & sandability which acrylic does not have). 5 minute epoxy (I get mine from the dairy supply, but it should be available from any hardware), & a popsicle stick to mix it. Dremel with this round bit which I don't know the name of, lol. Breathing & eye protection (& a light) when working with dusty & fumey things. Ave's Apoxy Sculpt & rubbing alcohol to smooth it (though water works fine too. I've started using alcohol as I've noticed it doesn't make so much of a mess of the putty when using a lot to smooth). Rust-Oleum primer in Red & white, & powderless nitrile gloves.
First thing I did was give him a go over with the carbide scrapers to take off seams. The scrapers are awesome since they go through resin like butter, but you have to work at it to hurt yourself on them (it CAN be done though!). You can purchase Carbide scrapers from Rio Rondo Enterprises . Trust me when I say that they are worth every penny!! So many uses!
After that I did some seam sanding, first with the coarser grit, & then with the finer, to take down any rough spots. I also used the small round file in some places, mostly on his legs.
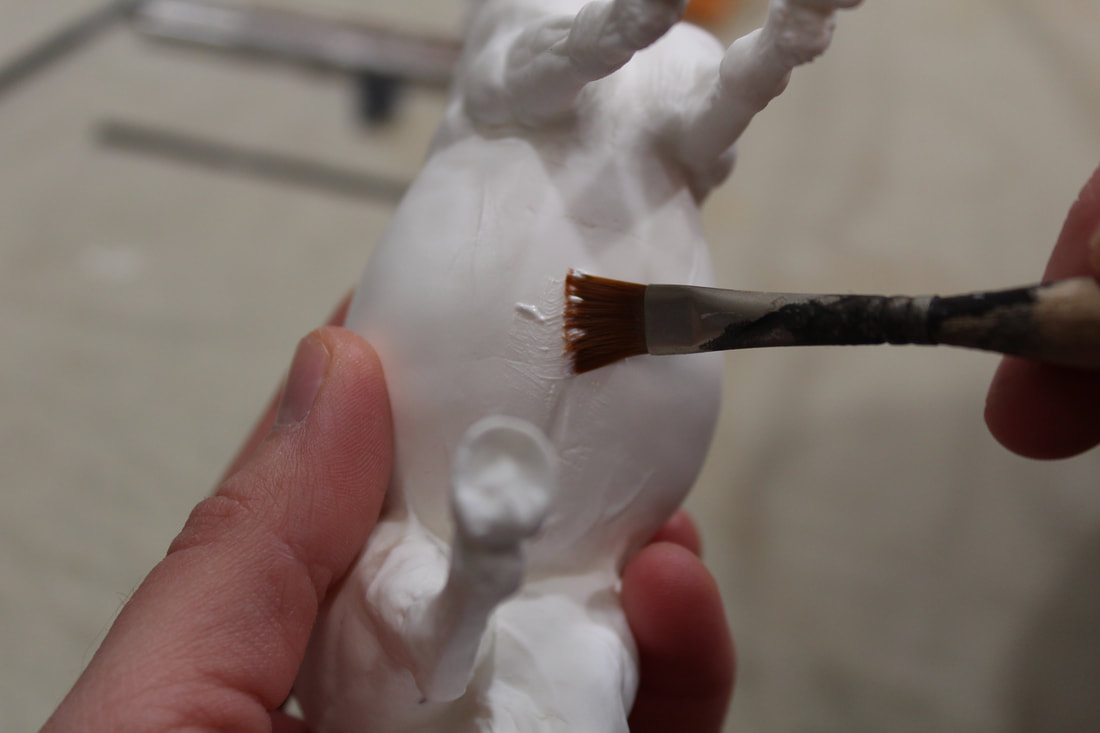
For pesky pinholes, since these ones were pretty small, I simply brushed over the affected areas with the Liquitex Basics gesso. Though both the gessos pictured above seem like they should be the same, the Basics one is much thicker & courser. This makes it lousy for painting (at least for me), but great for filling pinholes! Simply brush it over the holes, try to keep it smooth & without brush strokes, let dry, & sand. Sometimes I will smooth it out with a finger to get it down into the details more. I've also found it helpful to primer over the gesso, let cure absolutely, & then sand it down.
For a few of the more troublesome divots I used some modeling paste as well in much the same way as the gesso. It is thicker than the gesso, so a finger to smooth it over the target spot is all that's required. You can use a tiny dab of water to smooth the paste further if needed.
After that I did some seam sanding, first with the coarser grit, & then with the finer, to take down any rough spots. I also used the small round file in some places, mostly on his legs.
For pesky pinholes, since these ones were pretty small, I simply brushed over the affected areas with the Liquitex Basics gesso. Though both the gessos pictured above seem like they should be the same, the Basics one is much thicker & courser. This makes it lousy for painting (at least for me), but great for filling pinholes! Simply brush it over the holes, try to keep it smooth & without brush strokes, let dry, & sand. Sometimes I will smooth it out with a finger to get it down into the details more. I've also found it helpful to primer over the gesso, let cure absolutely, & then sand it down.
For a few of the more troublesome divots I used some modeling paste as well in much the same way as the gesso. It is thicker than the gesso, so a finger to smooth it over the target spot is all that's required. You can use a tiny dab of water to smooth the paste further if needed.
For the hoof wall I tried something new. I've recently added 5 minute epoxy to my tool box, & the more I thought about how I wanted to repair that hoof, the more I liked the idea of the 5min epoxy. It is a two part chemical reactive like epoxy putty, but in a glue like consistency that sets in a few minutes. You press both parts A & B out of the syringe tube onto something you can toss (I use cardboard from something like a tissue or cracker box), mix it thoroughly (I use a popsicle stick), & then use it how you want. Make sure to wear gloves though; I don't know if it would ever come off your skin if you don't! I carefully used the edge of the stick to layer it along the hoof wall until it cured. Once it was set, I Dremeled the hoof sole's details back in, & filed & sanded the outside to shape. It worked well, & I now don't need to worry about it chipping off like epoxy putty might have if it's hit wrongly.
I also put a couple dabs of the 5min epoxy over the wires on his back, which once sanded, turned out nicely.
I also put a couple dabs of the 5min epoxy over the wires on his back, which once sanded, turned out nicely.
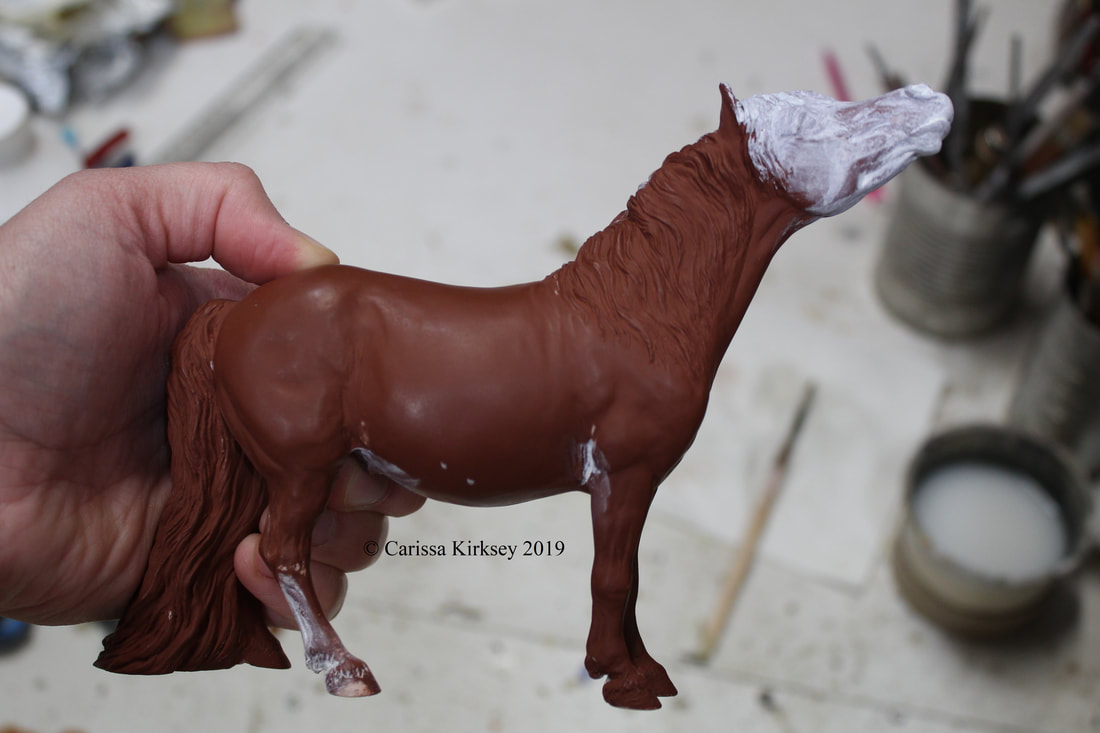
Once I got every flaw I could find, I hit Kip with some red primer to see what I had going on. Red primer catches light better than any other primer color to show details. …& faults! Like this seam on his pasturn...
Or a few pin holes, like this one under his chin...
More sanding needed on the seams on his front legs...
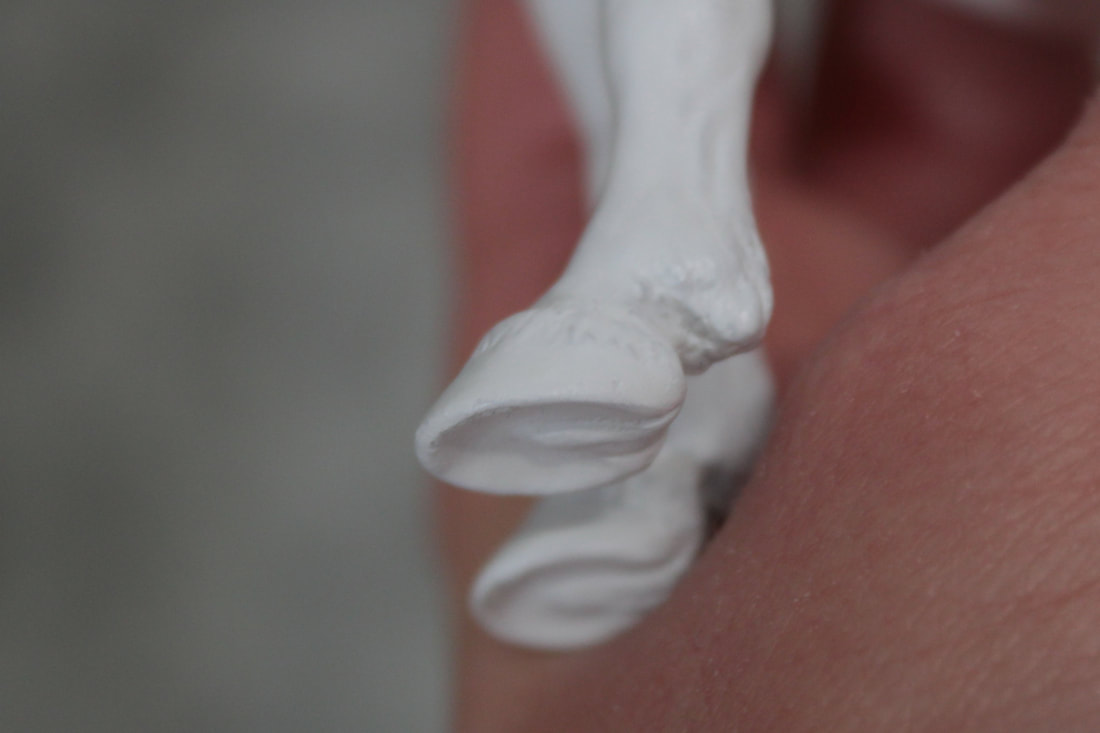
Or this glob on the inside edge of his ear. There's also a chunk missing from the other side which you can just see from here.

I filled that missing bit with epoxy putty, & I also replaced a chestnut that was missing (not sure how it was lost!). Which is where the second gesso (Liqutex Professional) came in, to paint over that chestnut to help blend in the edges. Epoxy putty, if you were not aware, is a two part chemical reactive; mix equal parts A & B together thoroughly, & it will start to cure. It is a staple for any model horse artist!
With the red primer I could see a few harsh details & gappish (did I just make a new word?) holes on his face, legs, main & tail that I wanted filled, so I gave these areas a layer of gesso as well. I also went over the pin holes on his belly & neck again since they weren't completely filled in yet.
With the red primer I could see a few harsh details & gappish (did I just make a new word?) holes on his face, legs, main & tail that I wanted filled, so I gave these areas a layer of gesso as well. I also went over the pin holes on his belly & neck again since they weren't completely filled in yet.

You can see here that the pin hole under his chin filled in with the gesso. It also softened the harsh lines on his jaw.

More primer, more flaws to fix.
& then finally...
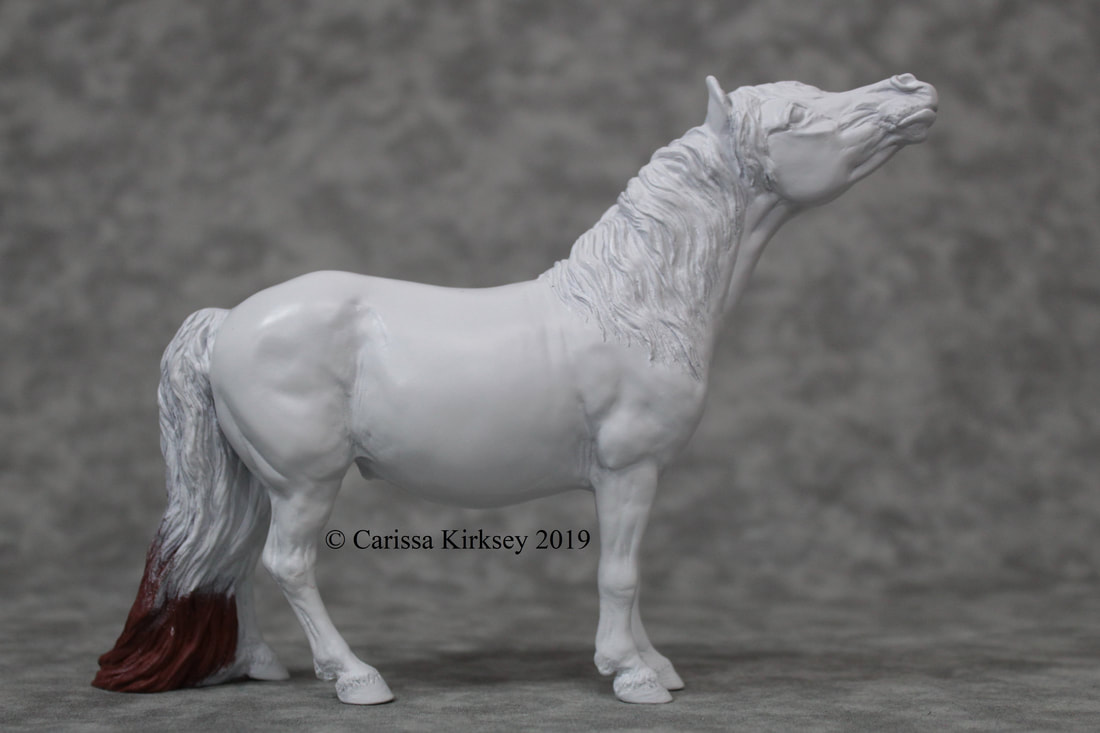
With a layer of white primer...
Everything appeared...
To be...
Smooth at last!
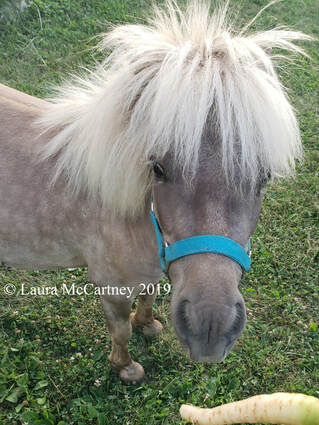
The reason I took him back to white is because he is to be a portrait of Astro, who is a silver dapple, & it simply gets me a step closer to that color to start off in white.
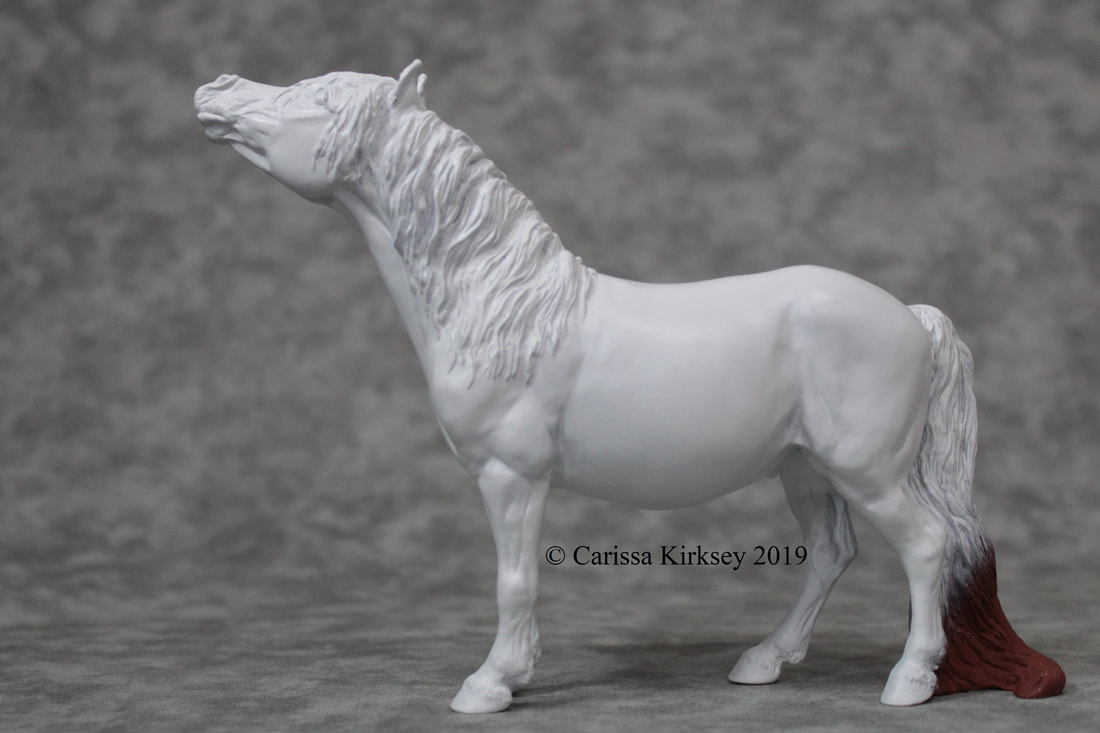
Well, he's ALMOST all white. I managed to spray white primer one step ahead of the polar vortex that hit & plunged us below zero with, at one point, wind chills of 38 below.
But that's ok! I'm pretty sure I'll be able to catch that last bit tomorrow since it's supposed to get up to about 20. & if not, this is still ok; I can put down a few more layers when it comes time to paint his tail. :)
Tomorrow's the day! Good luck everyone!!!
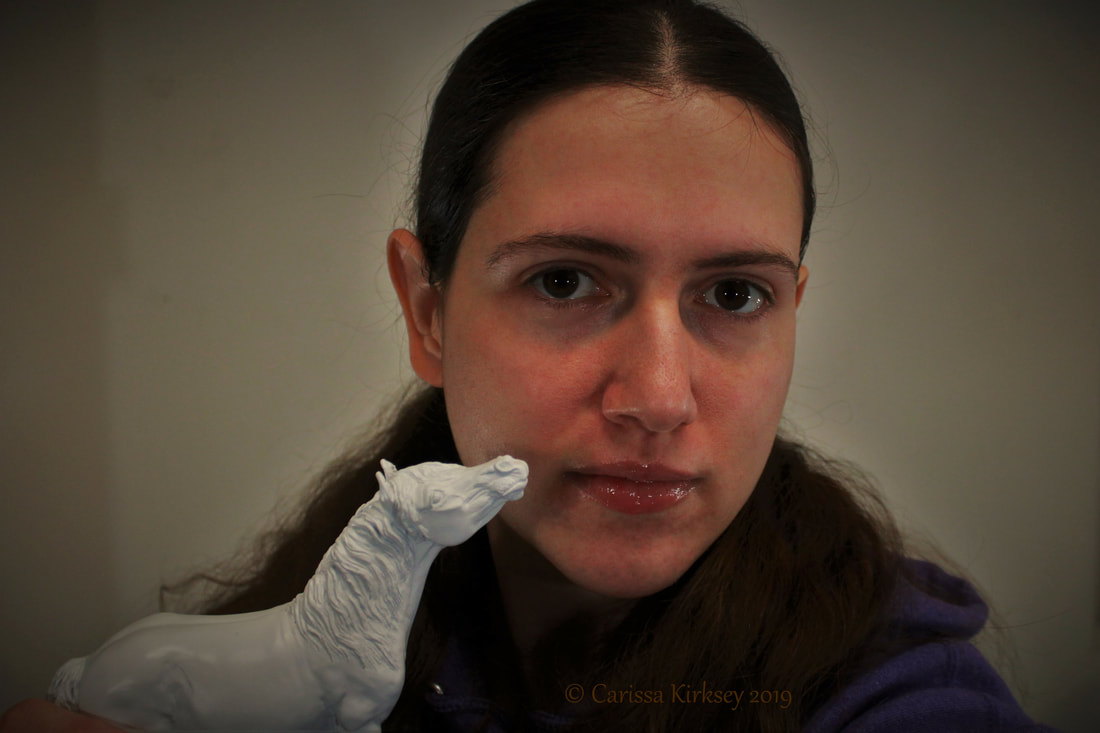
It's become tradition to take a NaMoPaiMo selfie with your blank canvas. Here is mine. ;)
 RSS Feed
